To be able to offer some DIY Arduinos I have been getting things ready to sell little kits when I visit places with my STEM activities. In trying to keep prices low I thought I’d buy bare ATMega328 chips and then load the bootloader onto them myself. And voilah!! I’ve done it with an Arduino and a DIY ISP that I found on instructables.com.
Just a quick explanation for those who don’t know what this is all about (at least assuming that you know what an Arduino looks like):
When you buy an Arduino, you’ll see a big chip on it:i
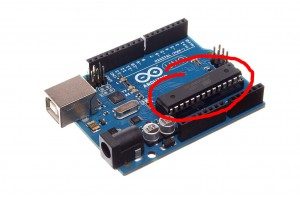
This chip is called a microcontroller and its name is ATMega328. Before you can use the ATMega328 on the Arduino board, a bootloader has to be loaded onto it. The bootloader is something similar to an operating system, such as Windows, on a computer. This bootloader is, of course, significantly smaller and does a lot less, but it does what is necessary so that you can connect the Arduino board to your computer and upload your sketches to it.

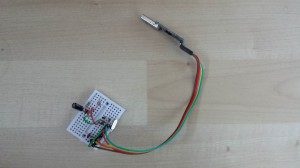
In the picture above we have a breadboard with a new ATMega328-PU chip on it. To the right we have an Arduino. I won’t repeat all the instructions here because it is well explained on theinstrucables.com website. Just follow the link. After burning the bootloader to the new chip, it can be used to build your own Arduino:
My first kit is ready to sell! Any takers?